This year I've been working my tail off to get everything done early so that I can enjoy time with my family (now that the kids are getting older, being together for extended periods of time is actually enjoyable...crazy, right?)
This last week+ is just so exciting...I've put together my top 5 reasons why I love it soooo much...
I really, really, truly do. I love it. Now, don't get me wrong...I don't love wrapping every. single. gift...in fact, I think we are pretty lucky that Santa does a not-so-great job of wrapping...he just sort of slaps the red wrapping paper on...the kids are lucky if they get an initial scribbled on the front to make it clear who the gift belongs to...
No, I love wrapping the other gifts...the gifts that we buy for the kids...the ones for friends and family...the gifts we give to the kids' teachers and pastors at church...those gifts. Love. it.
Another thing I love is that I don't have to drive all over God's green earth to pick up supplies...nope. I can get it all done in one trip...to Walmart...AND I don't have to worry that I'm spending too much, because Walmart always has the best prices...always. OH! And I don't have to remember to cut a coupon to get a discount on craft items (and not only that! Then I don't have to remember to actually bring the coupon with me...don't you hate when you forget that coupon???).
So when I was getting ready to get some supplies for gift wrapping this season, I headed out to Walmart. You can see my entire shopping trip here on Google+. But let me give you a few of the highlights...
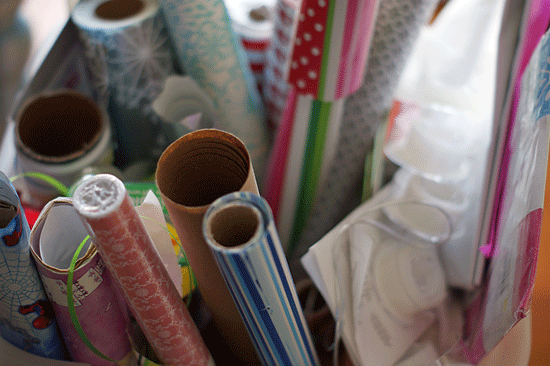
First let me start by saying - I have TONS of wrapping paper...and by tons, I mean, miles & miles & miles. I buy it after Christmas every year (at a huge discount), and then I promptly forget that I've bought it and I buy more before Christmas (every year). So, wrapping paper was not something I needed on this trip...what I did need was inspiration. So I checked out the Elmer's CraftBond and X-ACTO items...just look at how much stuff there is to choose from!
Rulers...I loves me some rulers...
...double-sided tape...I got a tip (thanks, Amy!) that this would be perfect for wrapping gifts...um, yeah...why did I never think of that???
...and these awesome templates...bunches of different shapes in each package! All you could ever need...
After some serious deliberating...you know, whatever...who am I kidding...I grabbed every single thing I wanted and put it into my cart...
So here's what I brought home: both of the X-ACTO rulers...the 12" Metal Ruler & the Zero Centering Ruler; the Basic Shapes Templates and the Craft Swivel Knife (to be used with the templates); Glue Spots in both Thin Small & Pop-Up Medium; the Permanent Double-Sided Tape and the Thick 'n Thin Journaling Paint Pen in Silver. Now I'm ready to start wrapping...
First I got all of my stuff out...all of my paper, my embellishments, everything...
What? You don't think that looks like very much stuff? Well...I'm wrapping only a couple of things right now...I didn't haul out the big guns for these gifts...
Here's the first thing I'm wrapping...don't laugh...my kids love to unwrap gifts, so pretty much everything gets wrapped...
...yes, it's gum. But it's a BIG tin of gum...
I usually use plain ol' scissors to cut my wrapping paper, but, I gotta tell ya...a ruler & X-ACTO knife is waaaaaay easier. And you get a cleaner, faster, straighter cut...
Let me just take a minute here to offer some really quick tips on how to wrap the perfect present...
*DON'T use too much paper...place your item on your paper and roll it around so that you see just how much paper it will actually need...then cut only that much. Too much paper looks bunchy & yucky.
*DO make sure to get tight, crisp folds... loose ends look frumpy.
*DON'T use too much tape...too much tape can make a package look like a 2-year-old wrapped it...unless, of course, you have your 2-year-old wrap your gifts...in which case, the more tape the better.
*DO make sure to get printed paper on straight...if your paper has vertical lines, make sure they are still vertical while you're wrapping...not slanty.
OK...now let's move on...
I mentioned before how I hadn't thought to use double-sided tape in my gift-wrapping? Well, now I will never NOT use it...not seeing that transparent tape stuck all over the gift is wonderful...
Here I used the double sided tape to attach some embellishments to the top of the gum tins...
Here I used some of the glue-spots & the double-sided tape to attached a little bow to the top of the gift.
Then you fold in both ends into the middle to secure them...
Take another small length of ribbon and wrap it around the center of the larger piece...I secured mine with a glue-spot and then used another glue-spot to adhere the bow to the package...
Easy peasy...
Now, we usually get gift cards as part of my kids' teachers' gifts...but I hate just handing out the cards in the little envelopes that come from the store. I like to jazz them up just a little.
I found this awesome template at Lemon Jitters...I printed it onto regular printer paper, cut it out with my X-ACTO Craft Knife & my metal ruler & then traced it onto scrapbook cardstock.
So instead I used the circle template & my X-ACTO Craft Swivel Knife for the thicker paper...worked like a dream...
Then I used my metal ruler (love this ruler) and a bone folder (do you have one of these? If not, you must get one) to fold the card holder into shape. Once folded, I used the double-sided tape and sealed up the sides...no mess, no fuss.
I used another little glue-spot and added a little embellishment to the top...
I like it so much better than just a plain old envelope...
Another thing I like to do when wrapping gifts is add two different kinds of paper. Usually I just do a small wrap-around of one paper over another, but with these awesome templates, I can really dress that wrap-around up...
First I wrapped my gift in plain kraft paper (love this look)...using double-sided tape on the back & sides...
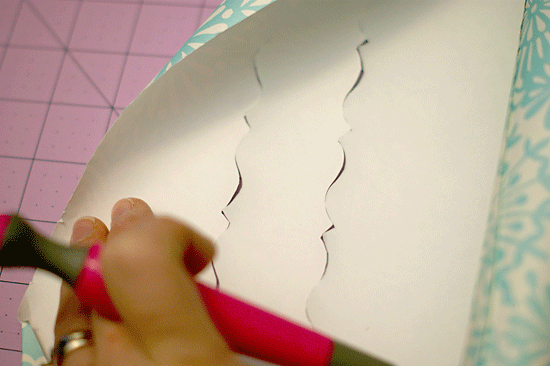
Then I took my other paper (this awesome aqua floral print from Martha Stewart), took the side of one of the stencils, and used my Craft Swivel Knife to cut out the design...first on one side...turned the stencil over...and then on the other side (in a random width I thought - hoped - would look good on my package).
Then I just cut two narrow strips of the floral paper (to wrap around the bottom of the package), removed the whole band from the roll of wrapping paper, and used the CraftBond double-sided tape to adhere the band to the package.
I love how neat & clean the sides look...
I almost forgot! I used yet another of the basic templates to make that tag...cool, huh?
I still have tons of packages to wrap (hopefully I will be done before Christmas Eve!), but I'm really looking forward to it...
What about you? Do you enjoy gift wrapping as much as I do? Or is it more of a chore that just has to get done? Do you think you would enjoy it more if you got some of those amazing Elmer's products? How about if you got the ENTIRE WALL of products? Yep. The entire wall. Wanna know how you can?
Just click below (or on the button on my sidebar) and you'll be taken to a giveaway for the entire wall of Elmer's Memory Keeping & X-ACTO products...that's a $250.00 value! Yeehaw!!!
Now, get on over to Walmart...pick up everything you need & then sit down and enjoy some time with your family...
DISCLOSURE: This project has been compensated as part of a social shopper insights study for #ElmersHoliday #gluenglitter #collectivebias #CBias
Yes, I was compensated for this post, but I would've written it anyway...I think these products are amazing...


